Getting Started
Ready to make your life so much easier by subscribing to one of our Lunch Plans?
This guide will walk you through registering for a plan and get started choosing your meals.
As parents ourselves we worry about food safety just as much as you do. We want you to be confident that when you order from us, your child's health is our top concern, and you can feel confident sending our food to school with them.
1. Choose a Plan

All of our plans are listed on the Plans Page.
We offer a selection of options for every parent. Choose from Smaller or Larger Kids (Larger Kids plans include a side to go with the lunch main) and then select the number of days you'd like to receive each week.
Click on the 'eye' icon on any plan to see more details, and when you're ready just click '+ Add To Cart'.
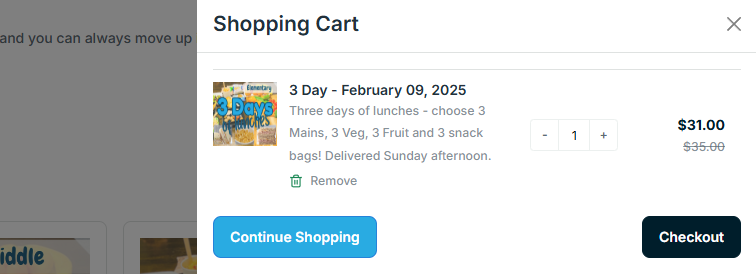
2. View your Cart
When you add your plan, our floating shopping cart will pop. Here you could select a Quantity other than 1 if you have multiple kids.
If you're ready, go ahead and click 'Checkout'. If you want to look around more, just click 'Continue' to close the shopping cart. Hint: You can always open the cart using the icon in the top right of any page.
3. Start Checkout

The Checkout page is where you will add your shipping and billing details. These will be saved to your account for later so you only need to add them once.
Go ahead and click on the 'Add address' button to start the process.
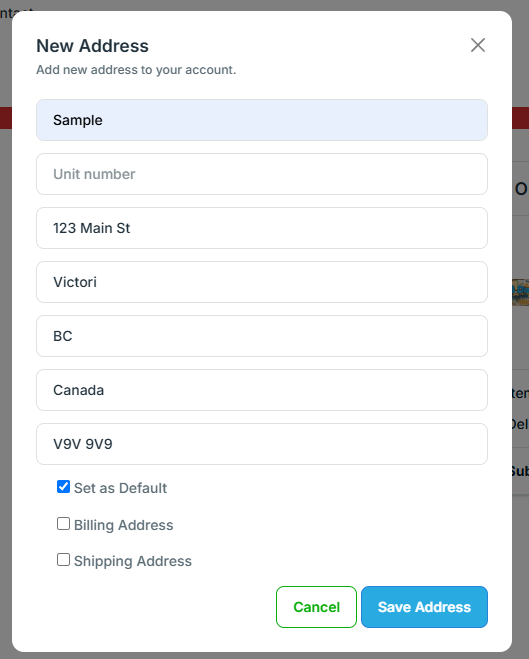
4. Add an Address
This is likely a familiar process, simply add your address, select 'Default' then go ahead and click 'Save Address'. You'll see there are options to add separate billing and shipping addresses if necessary.
5. Confirm Address
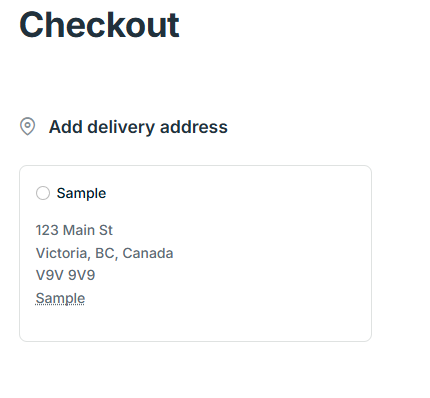
After saving, you'll see that your address is added and ready to go. If you need to have separate billing and shipping addresses, simply repeat the process as needed.
When you're ready, make sure the address you want is checked, then click 'Next'.
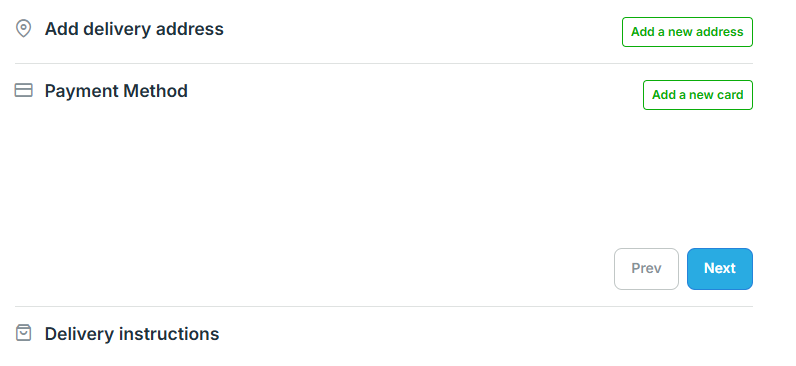
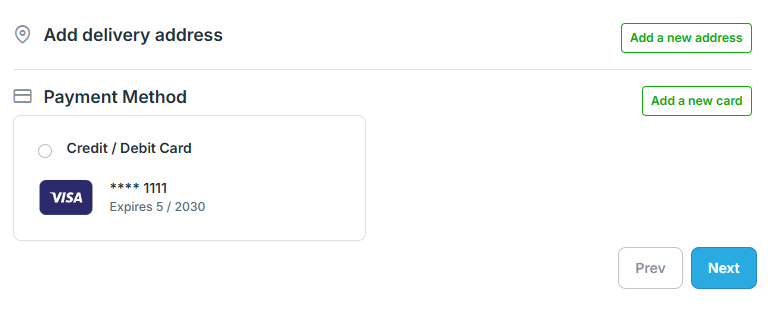
6. Credit Cards
Follow the same process for Credit Cards. You can have more than one saved to your account if needed.
Worried about security? We don't store your credit card data locally, it's only saved with the banks merchant account system.
7. Add Card

Go ahead and add your credit card data to the form. When you click 'Add New Card' the form connects with your banks system to store the card data, our system only sees the last 4 digits, CVV, and the date.
8. Confirm Card
Similar to the Address system, you can have more than one card saved if needed. You can manage this further (add/remove/edit cards) from Your Account once you've finished the Checkout process.
9. Add Note
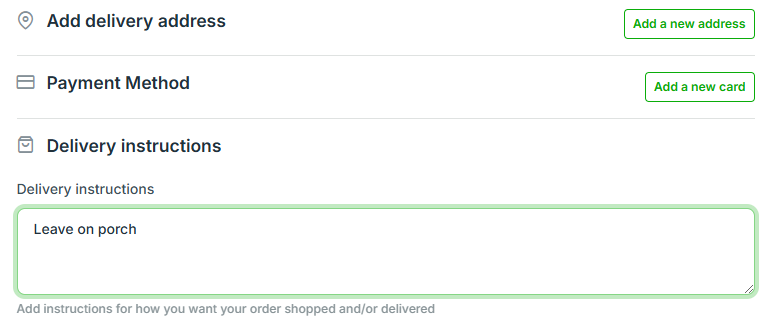
This can be an important piece for some customers. The Delivery Note will be given to our delivery driver to help them ensure your package arrives safely.
Some examples may be where to leave the package, a number to call, what to do if they can't get in, or information on how to enter an apartment building.
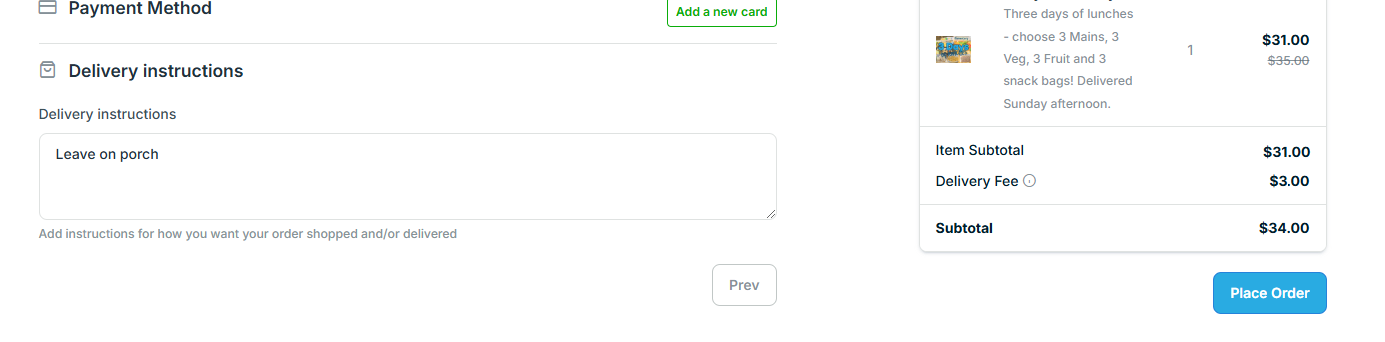
10. Place Order
Once you've added your information it's time to place your order. Confirm the Cart items are correct, then go ahead and click the 'Place Order' button.
This will process your first payment and create a Subscription for you, as well as open up access to your Account Settings and Delivery Calendar.
11. Delivery Calendar
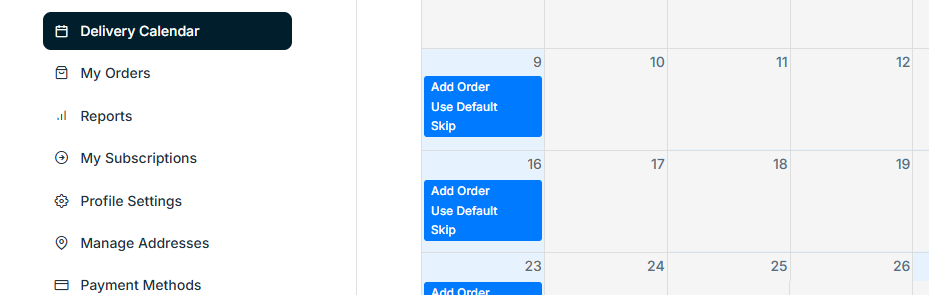
This is where you will manage your deliveries. Each week will have a selection of items to choose from, you'll see the days you are eligible to order highlighted on the calendar.
You can enter a custom order, go with the default order, or skip a day. You can set multiple days all at once, no need to manage it each week.
We hope this quick guide has been helpful! However, we know that many parents may have further questions about how the system works or concerns about what they are sending with their kids. We hear you, and we want you to be 100% comfortable ordering from us.
Please don't hesitate to Contact Us with any questions!